Raster Annotation Tools
Updated at May 19th, 2023
Raster annotation tools
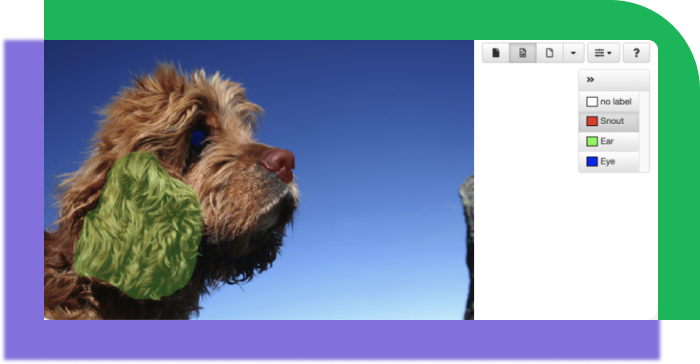
The tools are used to assign a category to each pixel of the image. All pixels are assigned a “no label” category to start with, and the annotation process consists of assigning categories to the pixels of the different objects in the image.

Tip
You can use all the annotation tools with the no label mask, which acts like an eraser — it will remove any mask that was previously applied.
There are three different raster tools, which each have different options in the secondary toolbar in the workspace. Depending on how the project has been set up, your workspace may only contain some of these tools. Since not all projects need every kind of tool, it's up to the project manager to choose which ones to provide.
Paintbrush
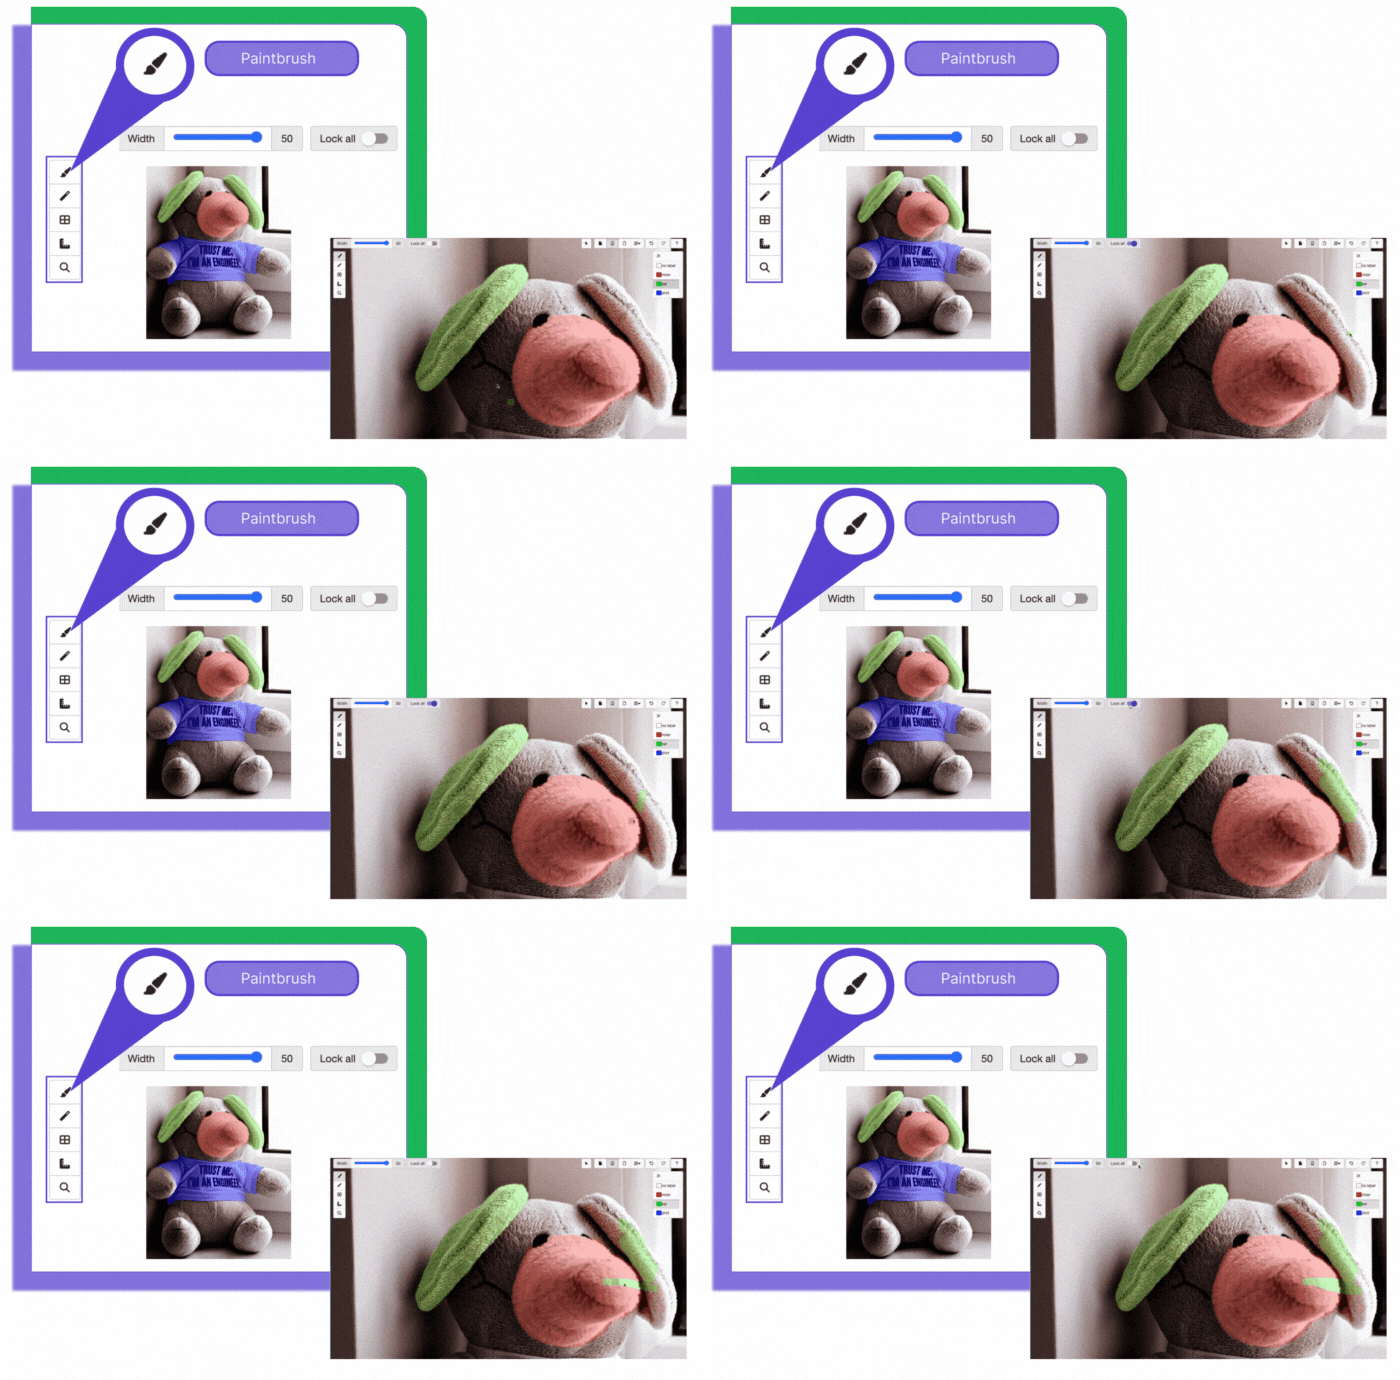
The Paintbrush tool is used to paint a mask over numerous pixels, using your mouse as a brush. This tool is useful for fine-tuning annotations, such as cleaning up edges and filling in small areas.
To paint pixels:
- In the mask panel, click on the mask that you want to paint with.
- With the Paintbrush tool selected, click on the Width slider and adjust the size of the brush to the desired number of pixels.
- Click on the image where you would like to start painting, and then drag to paint.
Lock All
Using Lock all, each applied layer will be locked, preventing color overlap when many objects are being masked.

Fill
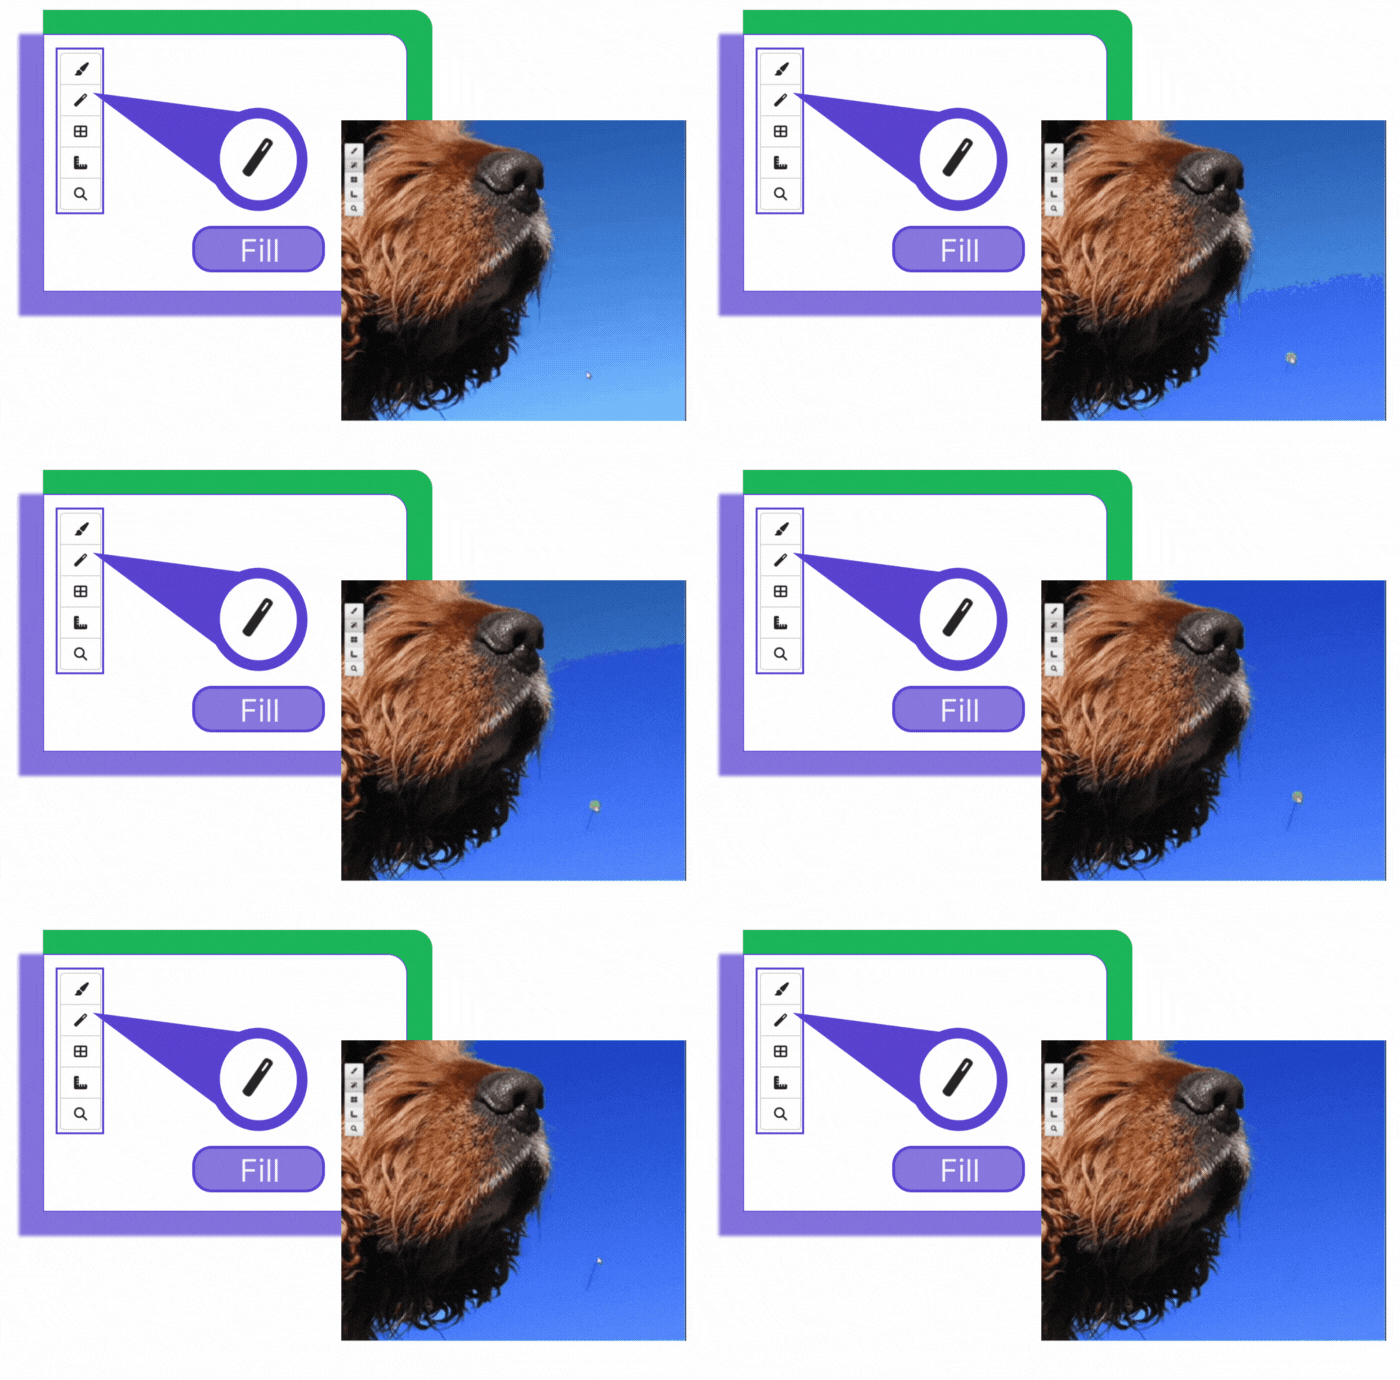
The Fill tool uses color and contrasts to quickly fill in groups of similar pixels. This tool is a great way to quickly fill in large areas that have little detail, and works particularly well with high-contrast images.
Tip
You can use the Paintbrush tool to paint along the contour of an object and create a boundary for the Fill tool to fill to.
To fill in pixels:
- In the mask panel, click on the mask that you want to fill with.
- Click on the image where you intend to start filling in pixels, and then drag outward from the starting point until you are satisfied with the number of pixels that have been filled. If you go too far, just drag inward again.
If you later would like to change the mask type, you can just select a new mask and use the Fill tool to re-fill the area.

Superpixel
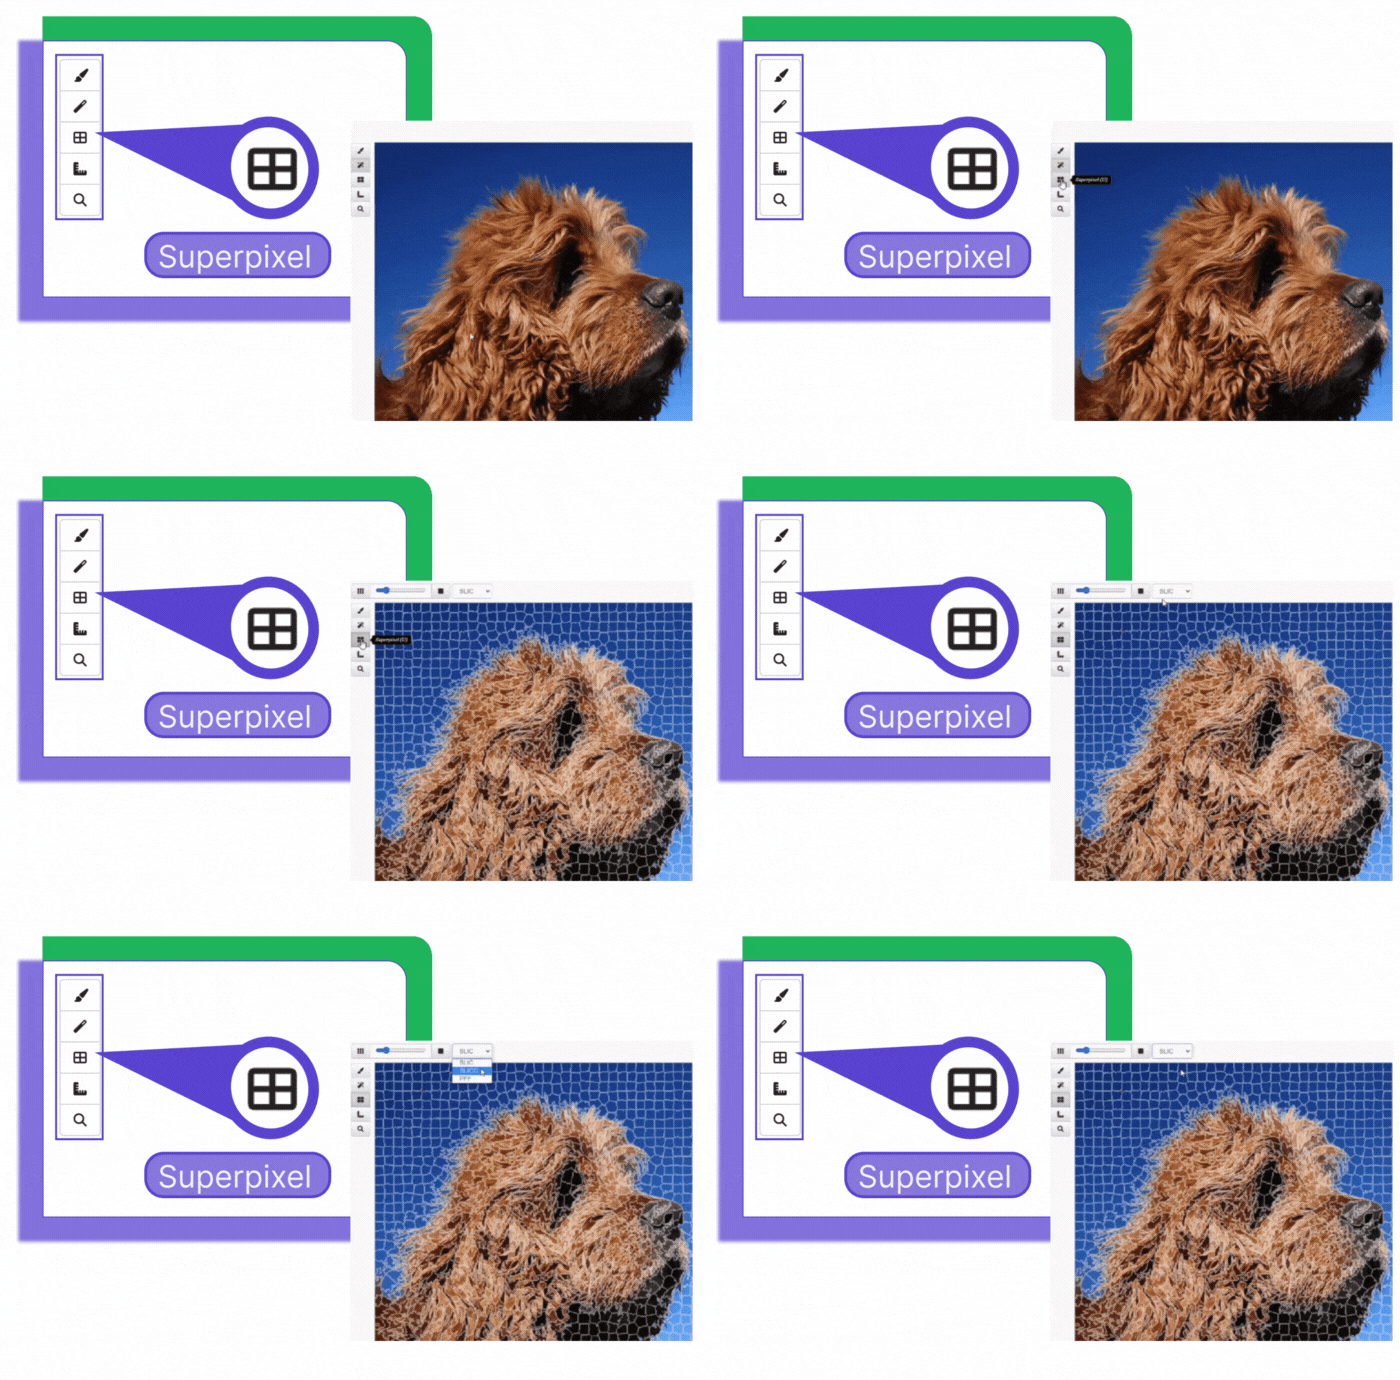
The Superpixel tool is used to break the image up into larger sections of similarly colored pixels. Three different algorithms are available to determine how the image should best be divided into sections. This tool is particularly effective for images that have large areas of similarly colored pixels.
To divide an image into superpixels:
- With the Superpixel tool selected, choose an algorithm from the drop-down menu above the image.
- Click on the Width slider and drag it to the left to make the superpixels smaller, or to the right to make them larger.
- In the mask panel, click on the mask that you want to fill the superpixels with.
- Click on each superpixel one at a time to fill it.

